Whether you're using your phone at night or just have sensitive eyes, the blue light filter on your Samsung Galaxy phone is a great way to instantly reduce any strain or discomfort you might feel while looking at your screen. While you can treat it as a simple on/off toggle, there are a few settings you should definitely check out.
How to turn on the blue light filter on your Galaxy phone
First thing's first, we want to make sure we're on the same page when it comes to knowing what your Galaxy phone's blue light filter is.
Part of your phone's display uses blue light to produce all of the apps, games, and videos you consume on it. Studies show that blue light can be dangerous and irritating to your eyes, however, which is why you might have a hard time falling asleep after using your phone right before bed.
A blue light filter does exactly what the name suggests — filters out the blue light from your phone's display so that it's less strenuous on your eyes. Enabling this feature on your Galaxy phone is as easy as pie.
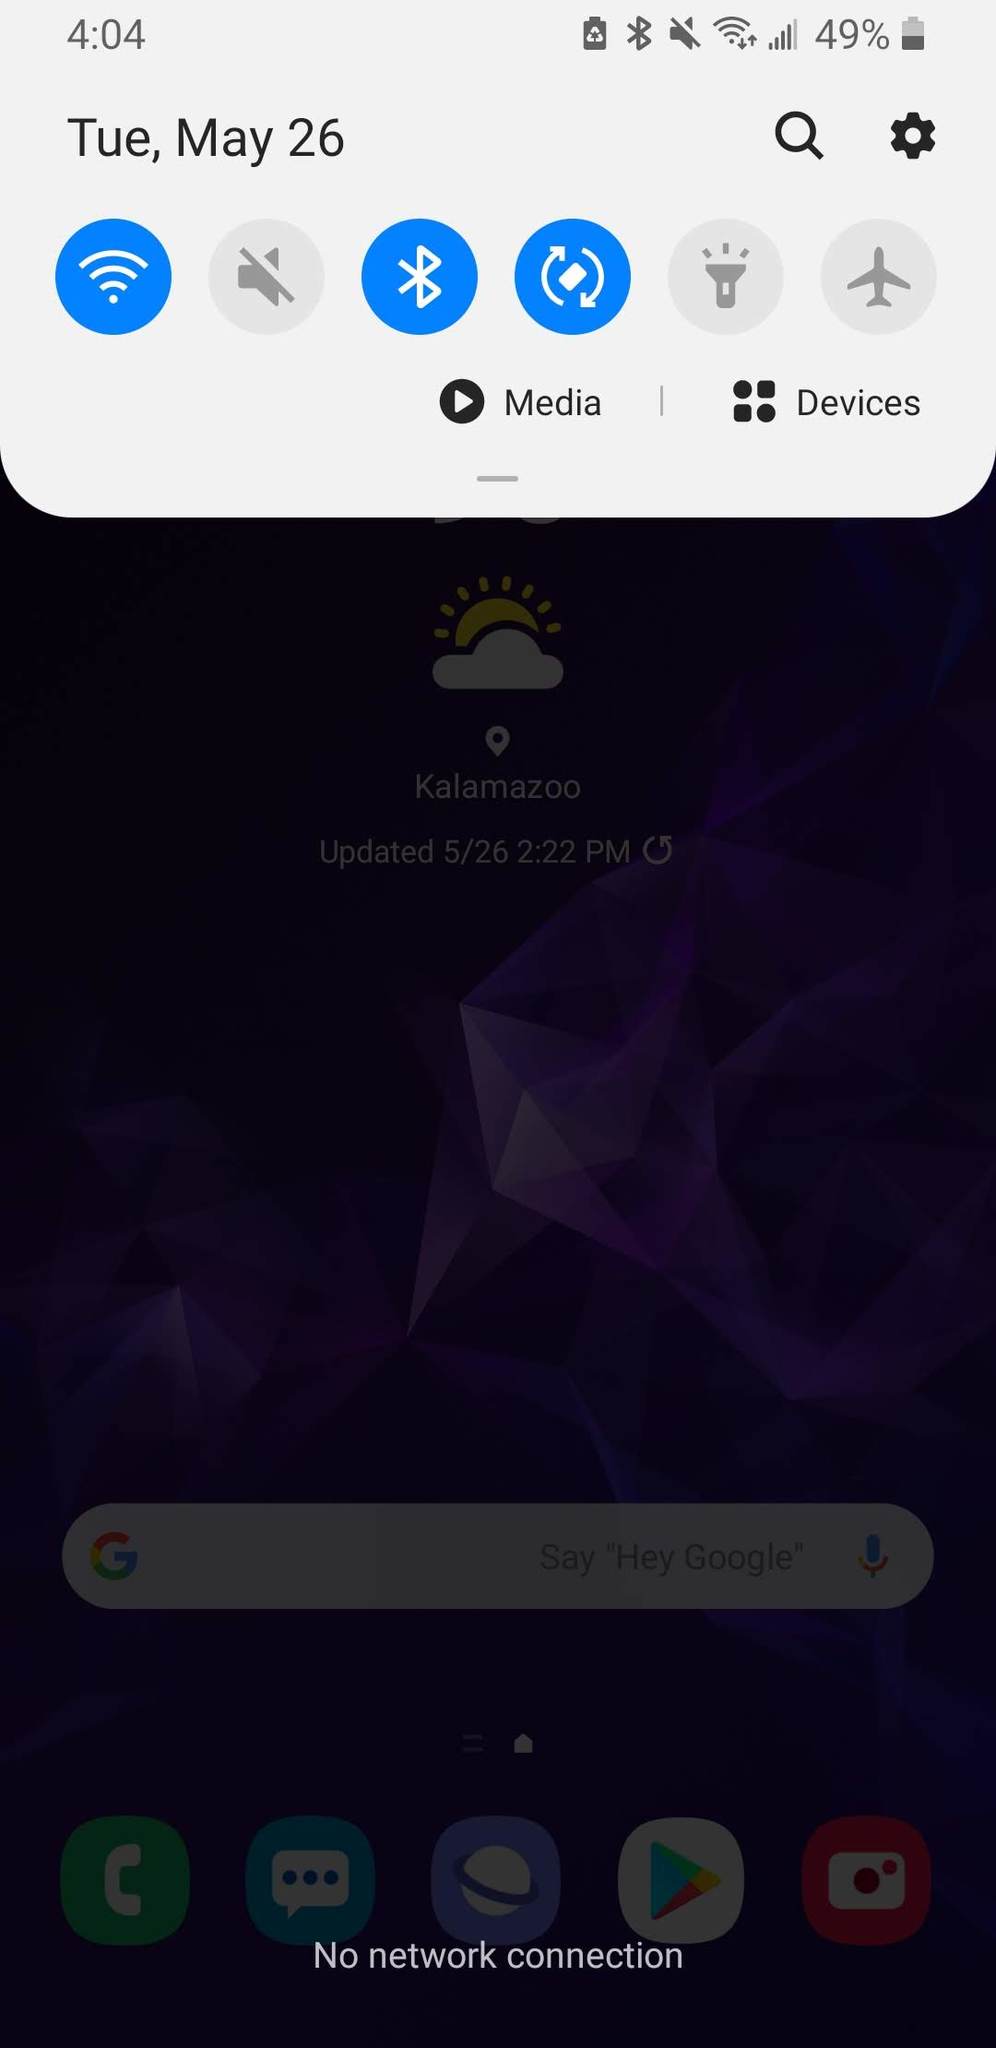
- Swipe down from your home screen to access your notification tray.
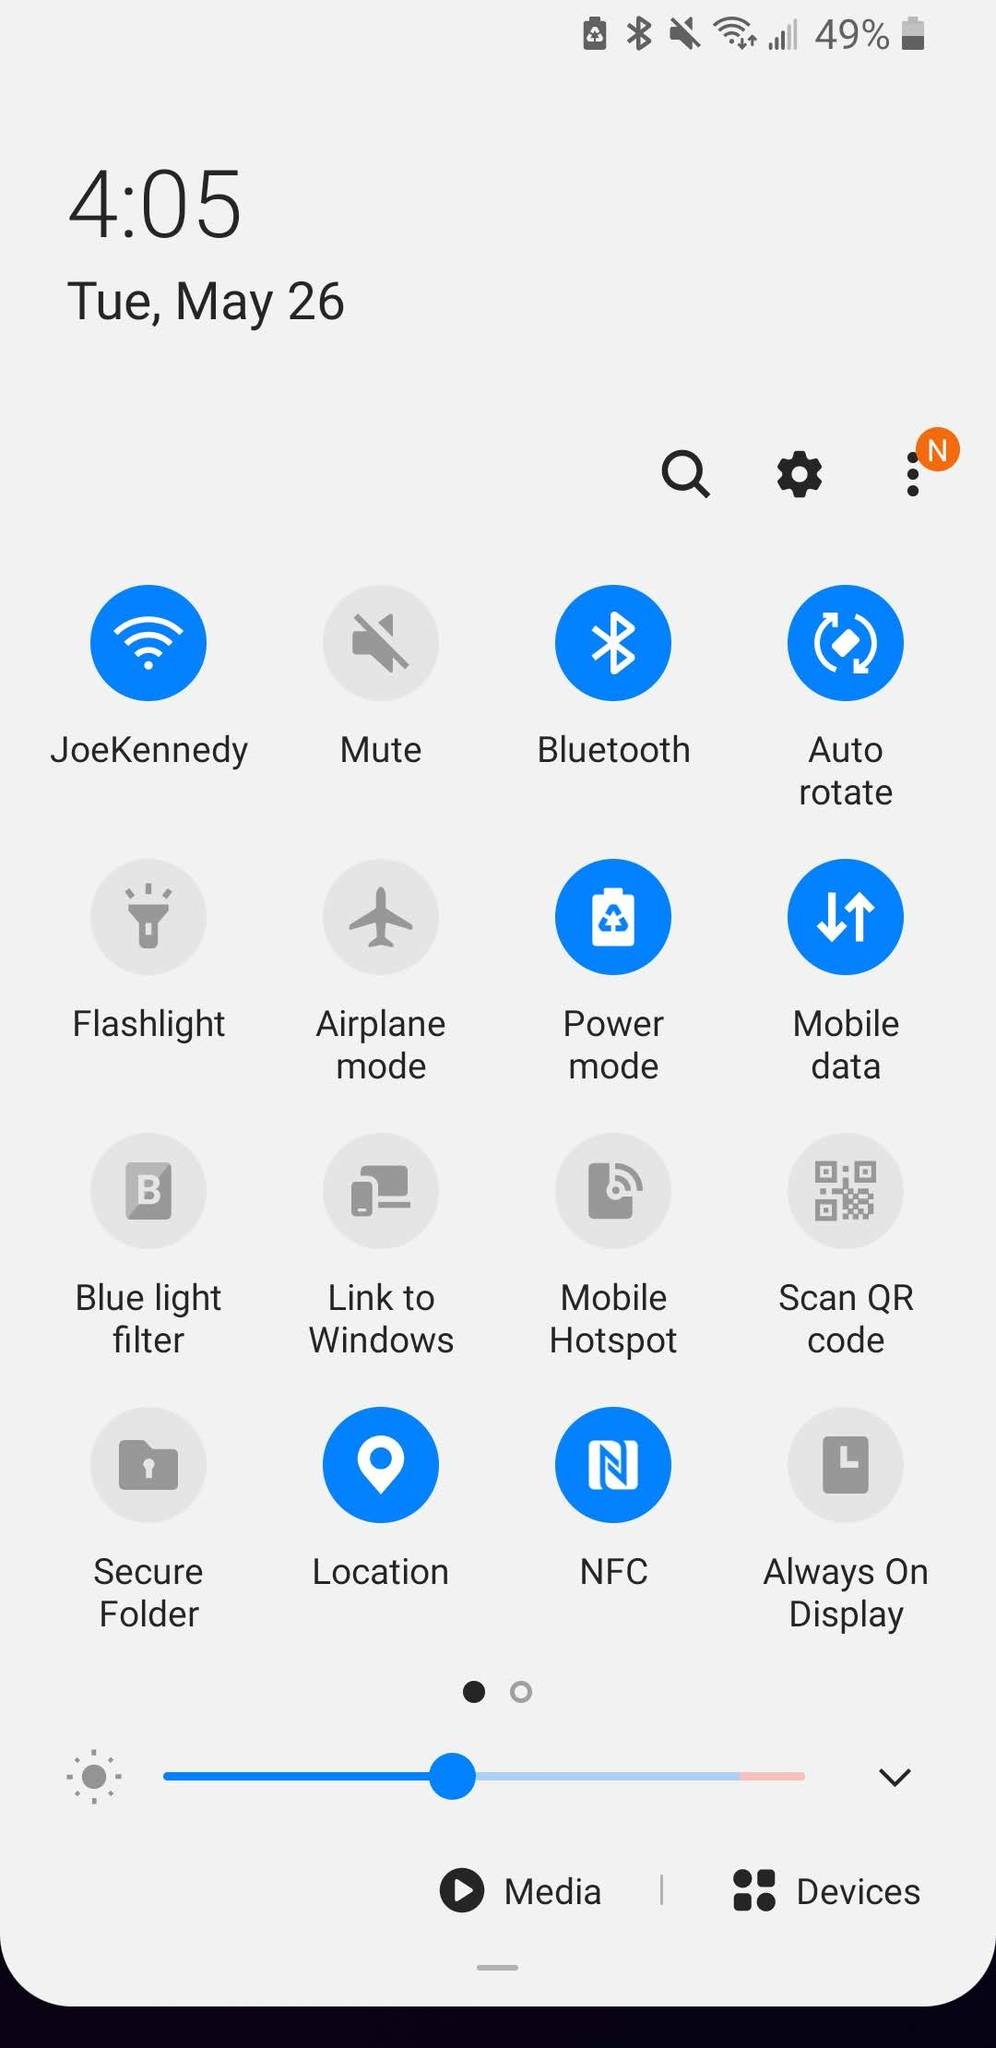
- Swipe down again to view all of your Quick Settings.
-
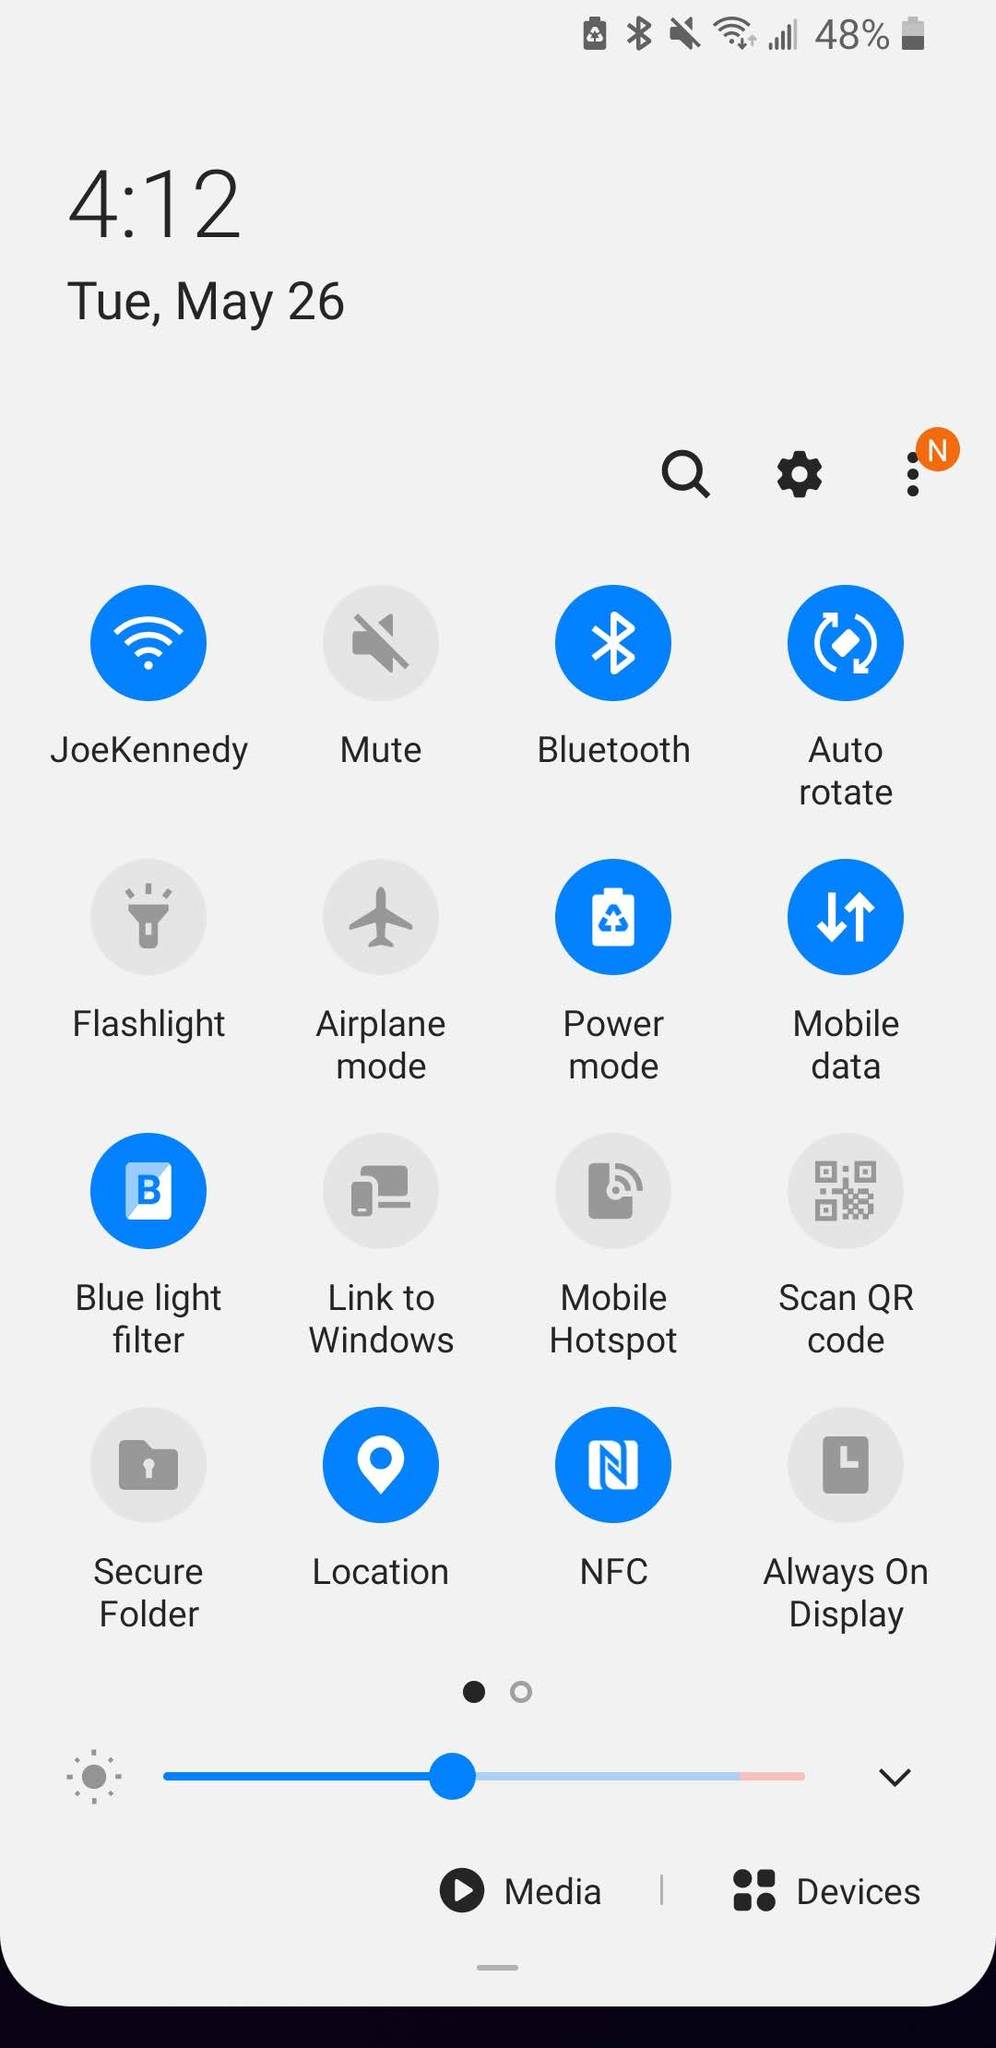
Tap the Blue light filter icon.
You'll know that the blue light filter is enabled when the icon turns blue, along with your screen getting a much warmer/orangish hue (you can't see that in these screenshots, but you'll notice it on your phone).
How to adjust the intensity of the blue light filter
You could make that the extent of your relationship with the blue light filter, but we recommend diving into its settings to fine-tune your experience. The first setting worth messing with is the filter's intensity, allowing you to increase or decrease how strong it is.
- Swipe down from your home screen to access your notification tray.
- Swipe down again to view all of your Quick Settings.
-
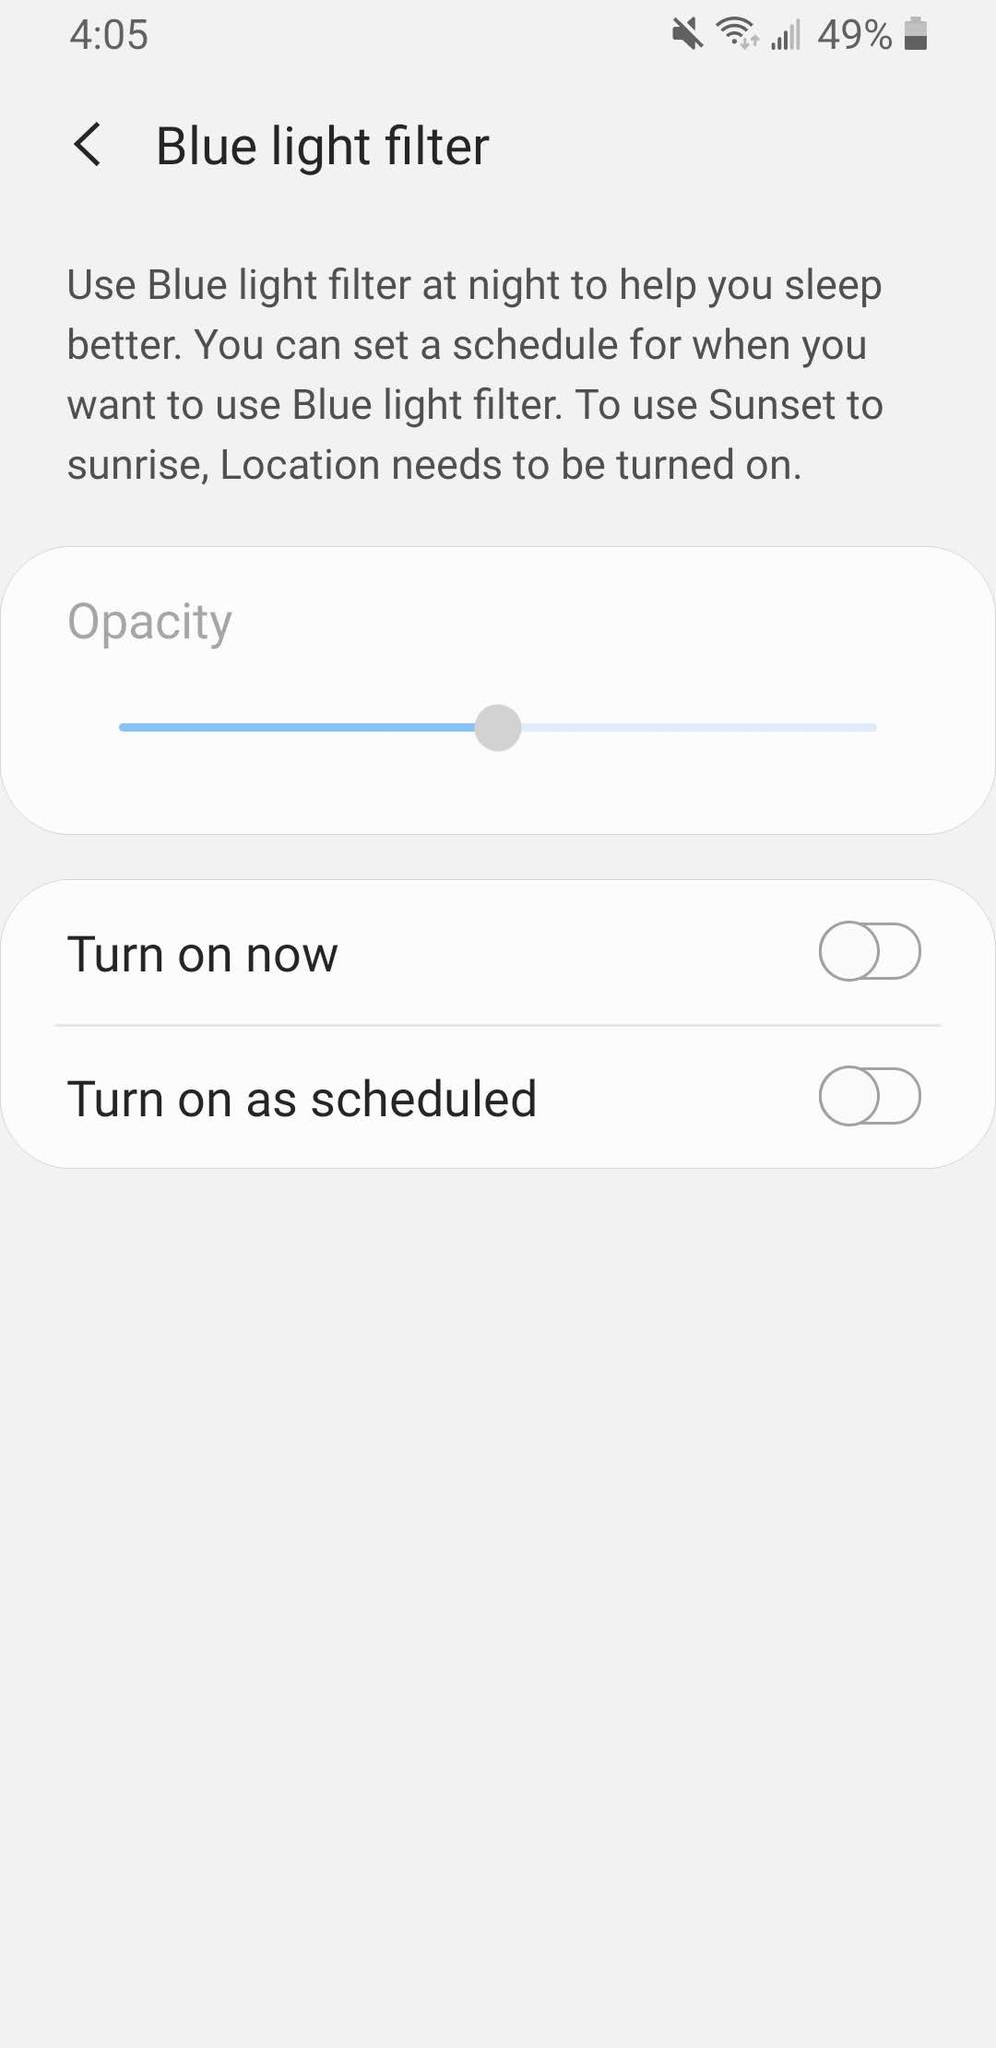
Hold down on the blue light filter icon until it takes you to a new settings page.
- Tap the Turn on now toggle if it isn't already enabled.
-
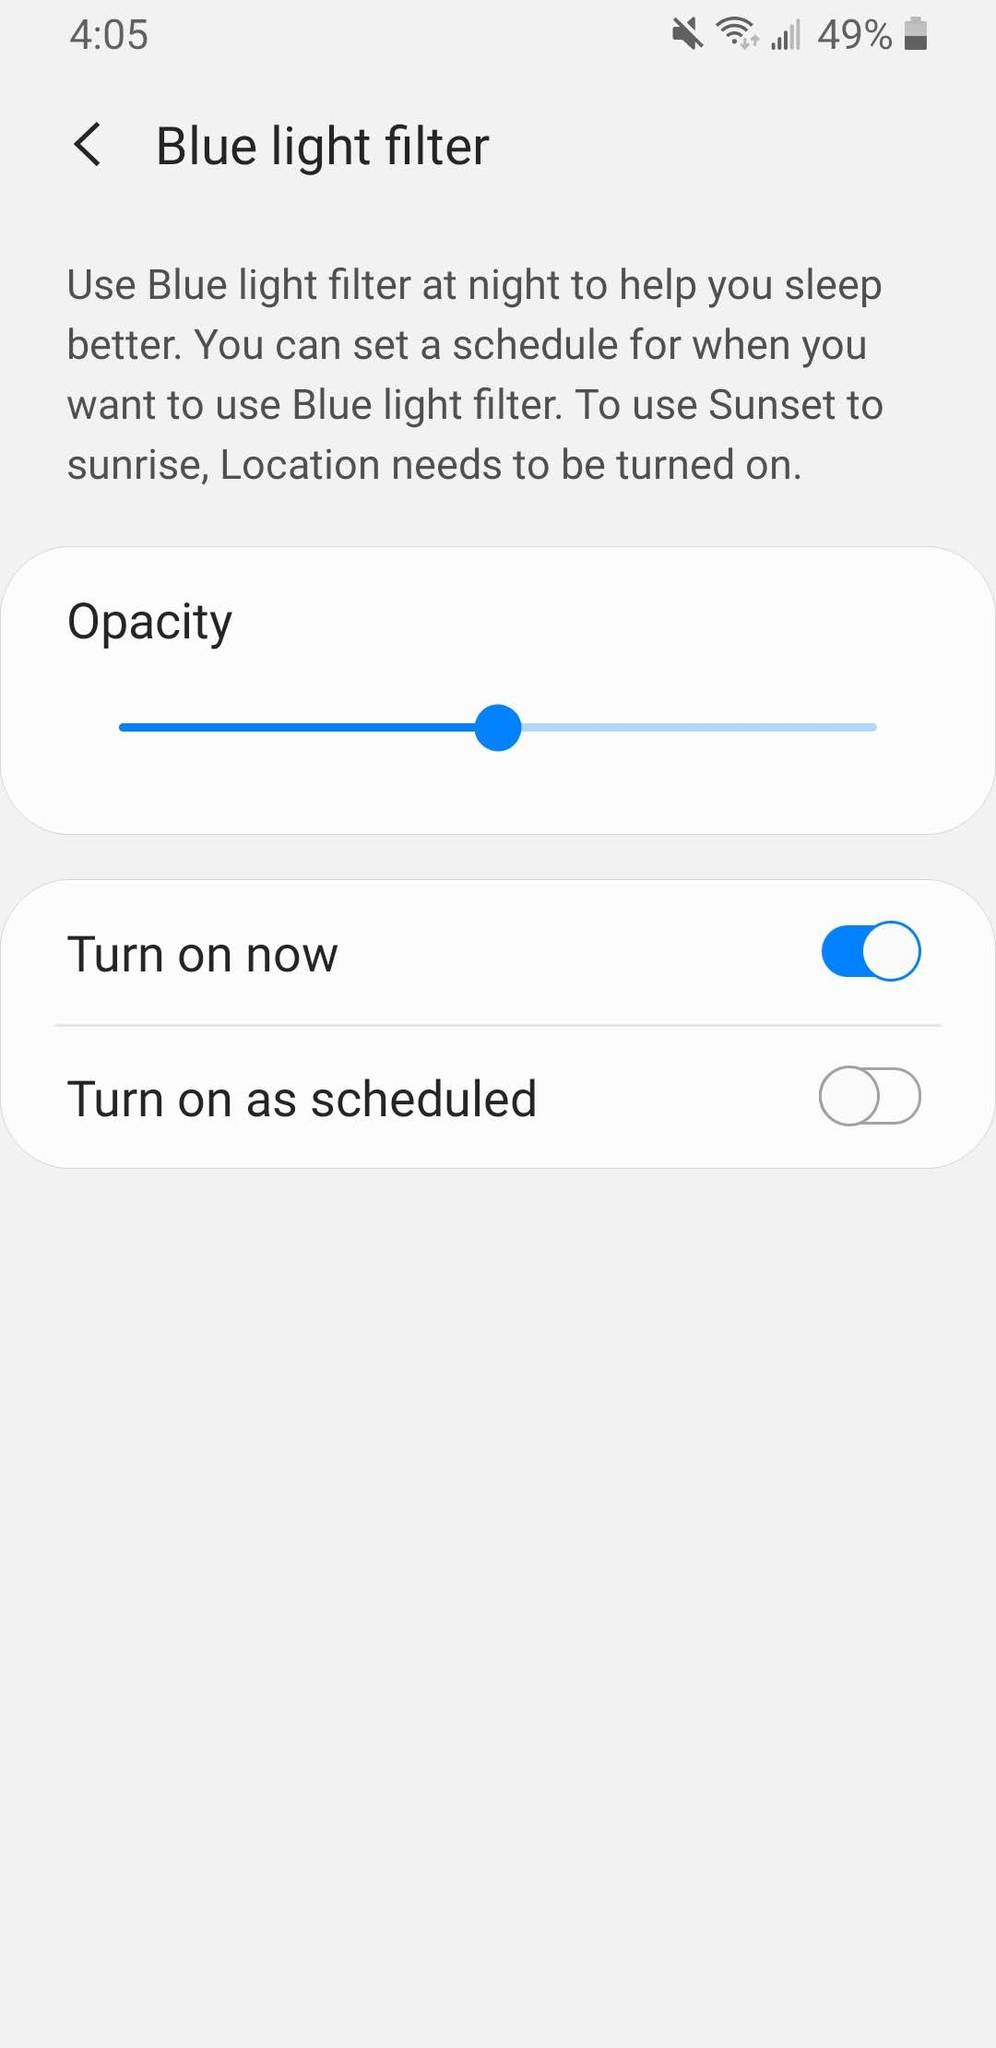
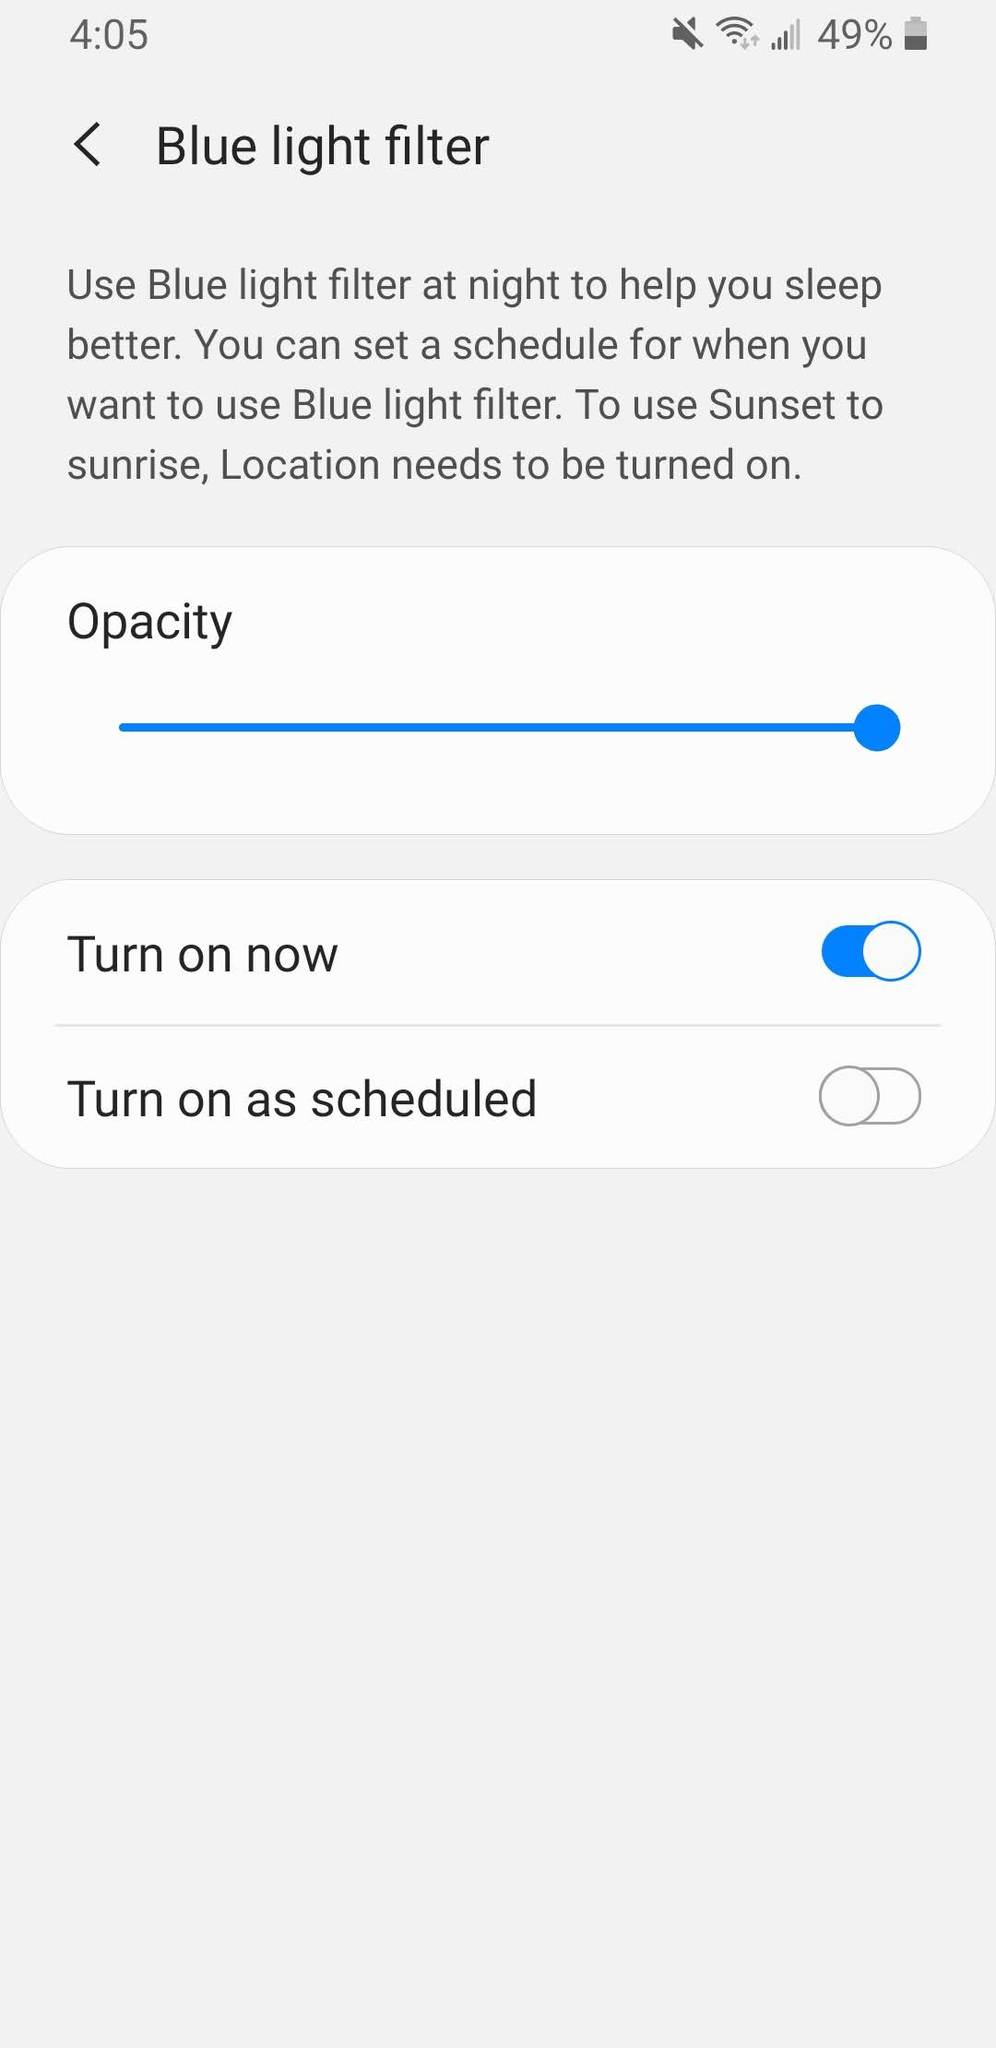
Drag the Opacity slider to the right to increase the filter's strength, drag it to the left to decrease it.
The Opacity slider will be set to the middle by default, and for a lot of people, it'll be a perfect middle ground. Moving the slider more towards the left decreases the orange hue on your screen, thus making it look more normal. Doing this, however, lessens the effectiveness of the filter. Dragging the slider all the way to the right makes your screen look super orange, but it also gives you as much protection as possible from your phone's blue light.
How to set up a schedule for the blue light filter
Manually turning your blue light filter on and off is fine, but there's a better way to go about things — setting it up on an automatic schedule!
- Swipe down from your home screen to access your notification tray.
- Swipe down again to view all of your Quick Settings.
-
Hold down on the blue light filter icon until it takes you to a new settings page.
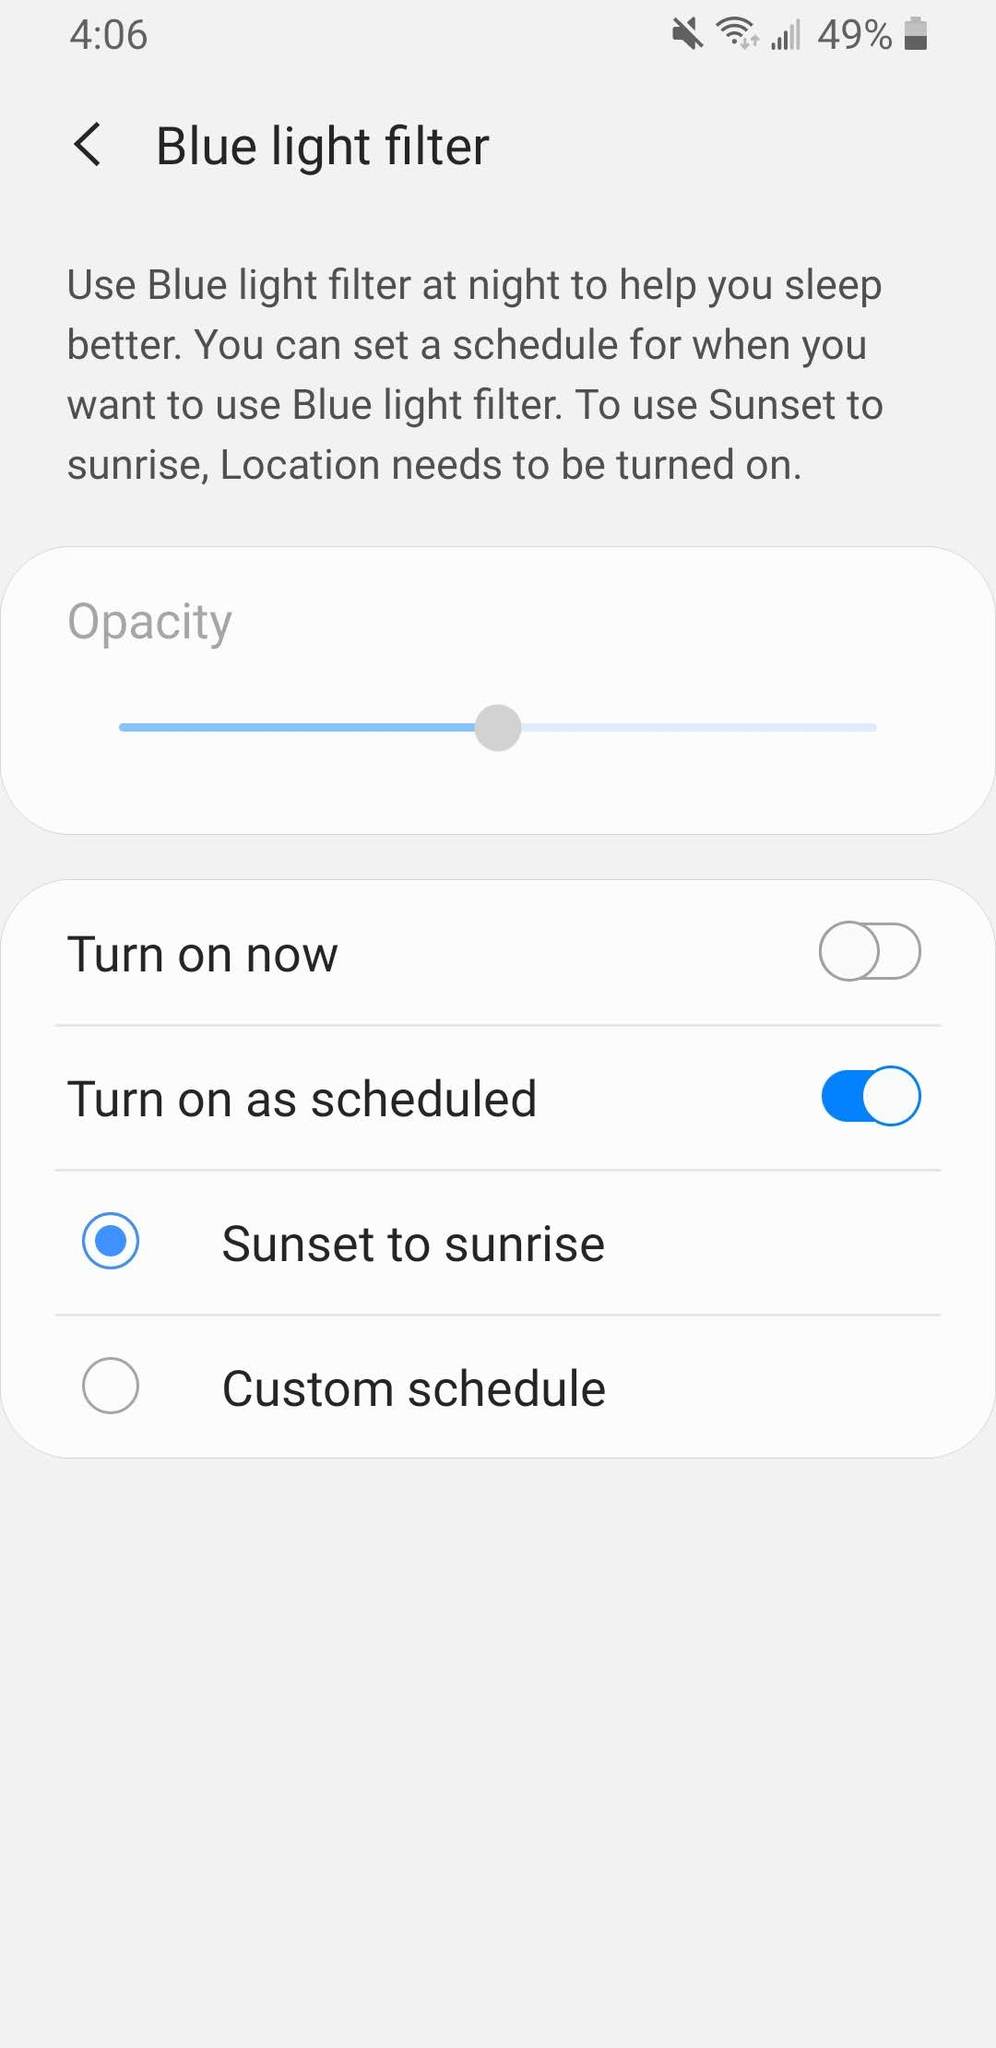
- Tap Turn on as scheduled (By default, it's set to turn on/off in accordance with the sunset and sunrise).
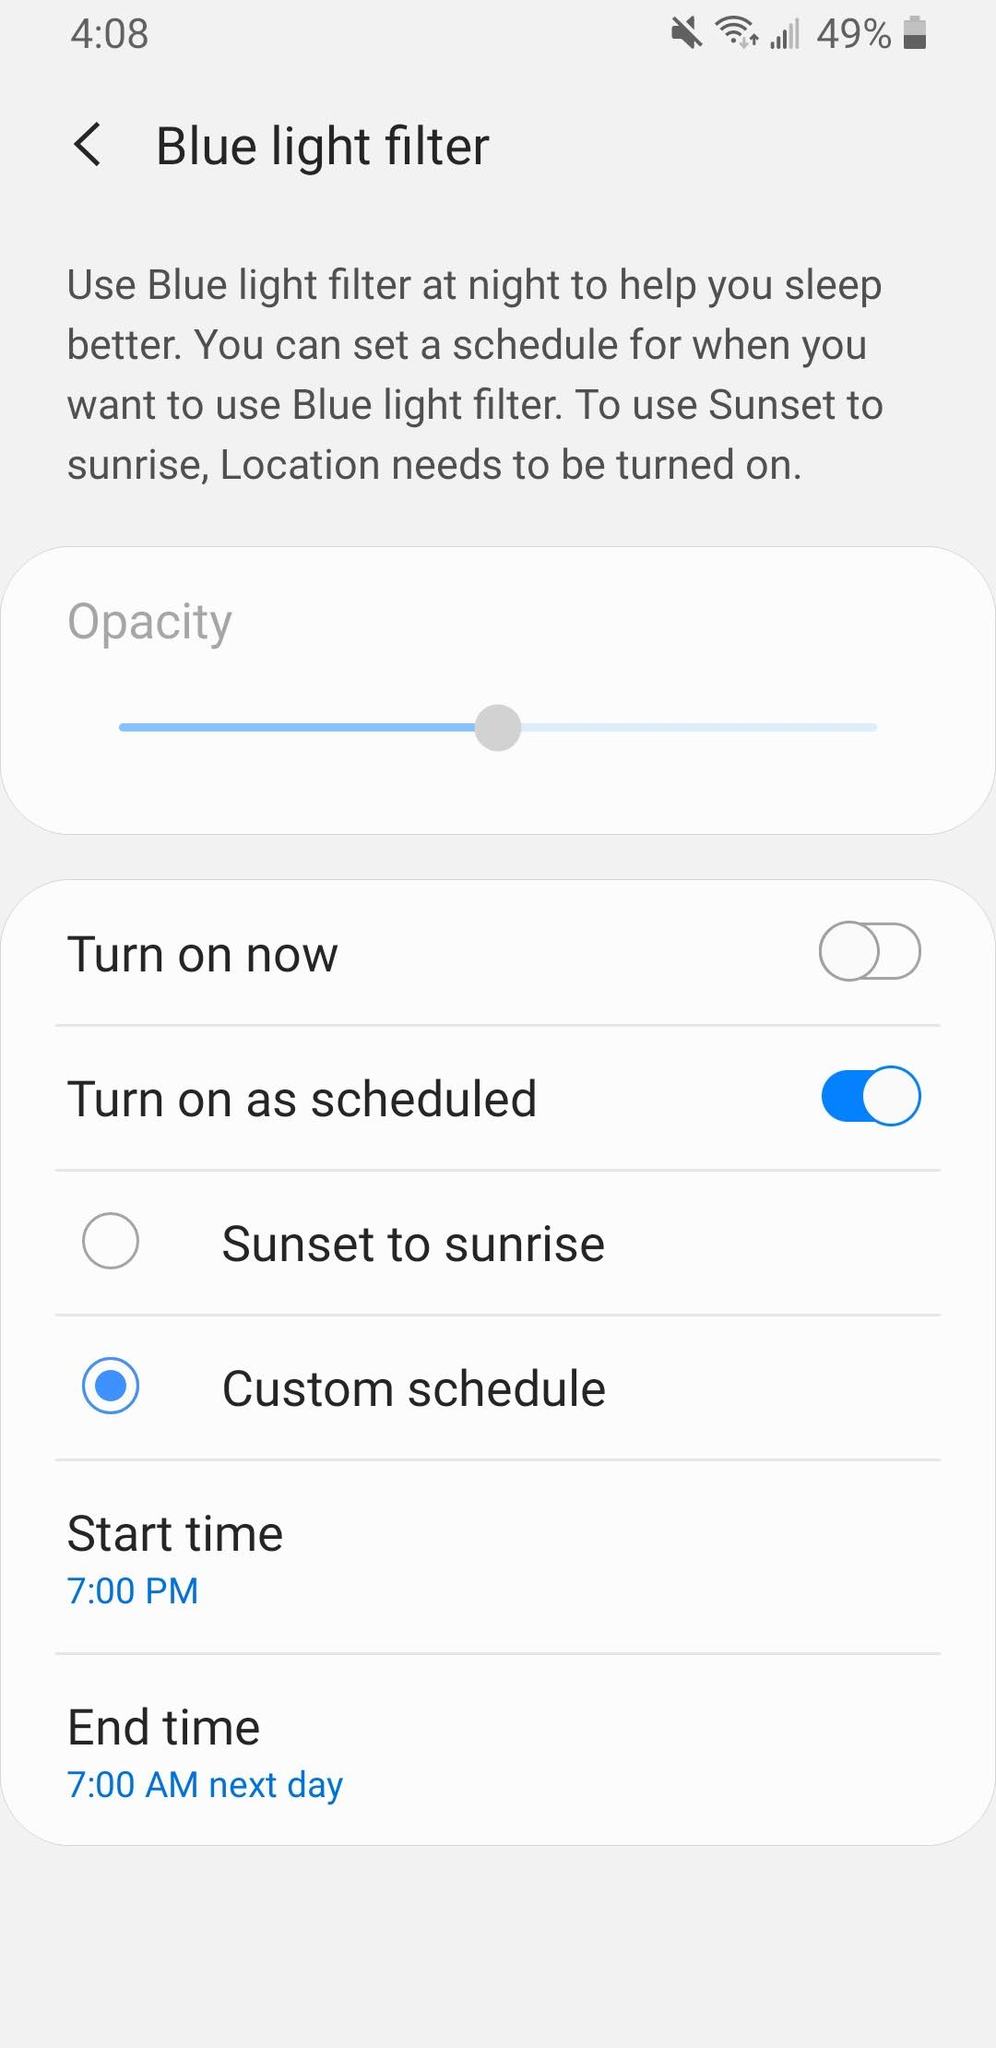
- You can stop here, or tap Custom schedule to pick your own on and off times.
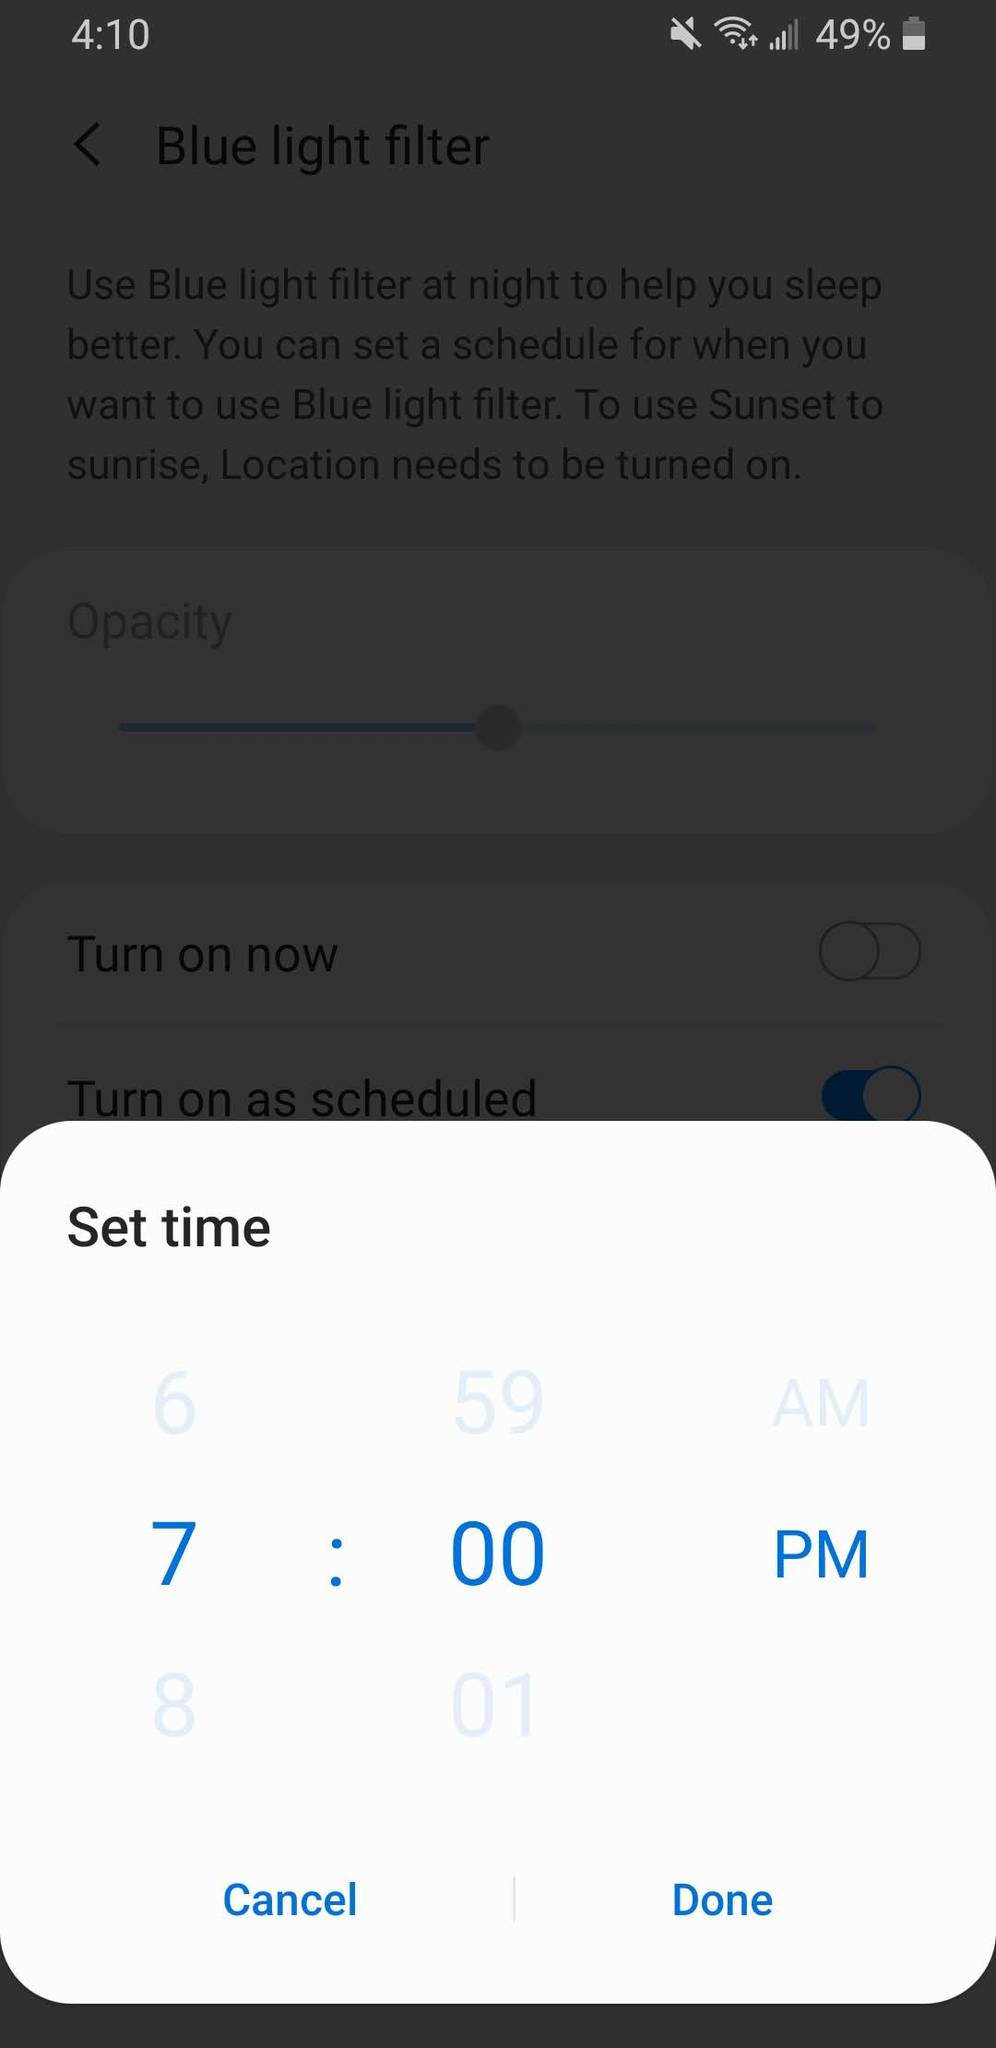
-
Tap Start time and End time to set the times you'd like.
No matter which option you choose, having the filter set up on any sort of schedule is a great way to make use of the feature without having to constantly think about turning it on or off.
Our top equipment picks
Does it all
Samsung Galaxy S20
$800 at Samsung $800 at Best Buy
Compact, powerful, awesome
The Galaxy S20 is one of those Android phones that doesn't skip a beat. It has a gorgeous AMOLED display, incredible processing speed, and three rear cameras that take gorgeous photos. Add all of that together with long-lasting battery life and a form factor that's easy to use in one hand, and you're in for one heck of an experience.
from Android Central - Android Forums, News, Reviews, Help and Android Wallpapers https://ift.tt/2Abp2bm
via IFTTT


Aucun commentaire:
Enregistrer un commentaire